Great photo – shame about the file size?
It happens all the time – a great photo opportunity occurs – kids with ice-cream down their faces, a pet pulling a daft pose, a family outing etc all make really great photographs but when you come to view them later, you realise the file sizes are so small that they're not suitable for anything bigger than a postage stamp.
Luckily, and depending on the image editing software you have, there are several things you can still try if you'd promised yourself a photo gift personalised with such an image.
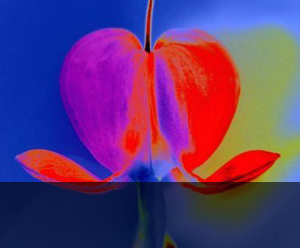
For example, if you have some paint 'effects' to choose from, have a play with applying various effect filters – some photographs are more suited than others to effects like watercolour or chalk effect so its worth playing around and trying different effects out.
DON'T FORGET TO SAVE THE ORIGINAL FIRST AND WORK ON A COPY!
These 'filtered' photographs can then be re-sized a lot more successfully than the original. Another option may be to try re-sizing as much as possible and then tiling the photograph to fill the required print area. If you've got lots of similar photos, why not make a collage of them? Lots of smaller files make one larger file which will very often be suitable for resizing or printing at size.
You could even do an Andy Warhol style montage – these are very effective and the effect itself is available on a lot of image editing software, where you can change the primary colours of each 'frame' thereby creating a very pleasing overall effect.
With any of the methods, if you've got a particular photo gift or other use in mind, always go larger than you need to (in proportion) to allow for trimming and image bleed. If you're adding a border or text, make sure these are placed well inside the edge so they are not lost in the bleed at the edges.
Finally, always work in 300dpi. This is the optimum resolution for printing. Don't worry if your file size gets too big to use (Fabulous Photo Gifts can take image uploads of up to 10Mb online) as you can always try reducing your dpi in steps – 280dpi, 270dpi, 260dpi etc until the file size comes under 10Mb. Of course this doesn't matter if you're supplying your finished image on cd to your printer or photo gift producer.
Don't forget to look at your image at 'print size' rather than just the default 'fit on screen' size. This will give you a much better idea of what your photograph will look like when it's printed. Watch out for photographs where a soft focus was used or the intended subject is out of focus to another part of the photograph as these soft focus areas often appear pixelated – pay particular attention to skin tones as this pixelation (the blockiness that occurs) can sometimes 'add' shading to an image as it tries to second-guess what detail should have been in that pixel.
Smaller images needn't be deleted – you can have great fun with them using some of the ideas above or creating your own, and the results are usually of sufficient quality to be used on a wide variety of photo gifts, like the ones available at Fabulous Photo Gifts – click here to see more.
Fine Chocolate offers, tutorials for Blogger, Twitter and Tumblr etc. Published social networking 'how to' articles and News of licenced photography sales by Mandy Collins from the Purple 13 studio.
A little flavour of what's in store...
- Gifts and Giveaways
- Fine chocolate gifts - Blogging Tutorials
- Blog, twitter and tumblr - Social networking tips
- Published how-to articles - Licenced image sales
- Art & photography by Mandy Collins

Gifts & Giveaways
Fine chocolate offers and vouchers....latest offer

Blogging tutorials
Easy tips to make your blog, twitter or tumblr accounts look good....see example

Social networking tips
Published articles by me on networking and social tools....see example

Art & Photography
Licenced images by Mandy Collins....read more
Wednesday, May 28, 2008
Subscribe to:
Post Comments (Atom)
No comments:
Post a Comment