This Friday is National Doodle Day. The day when doodles by the rich and famous are auctioned off to raise money for charity.
We wish them well with their auction - this years includes doodles from Jonathan Ross, Joanna Lumley and Ricky Gervais to name but a few. You can check out their website by clicking here.
National Doodle Day is about having fun whilst raising funds to help people whose lives are affected by epilepsy and neurofibromatosis. Why not enter their national competition and doodle alongside hundreds of celebrities and help them to build on the £160,000 raised so far!
Don't forget when we say personalised photo gifts, what we really mean is you can take a child's painting or drawing or even your own doodles or works of art and scan them into your computer (make sure the paints dry first). The finished scan also makes for a great personalised gift!
For more help with scanning at home, why not see our earlier post - a 'masterclass' of tips and advice to help you get the most out of your home scanning, regardless of whether you're scanning for a photo gift order or just for your own uses.
A little flavour of what's in store...
Gifts & Giveaways
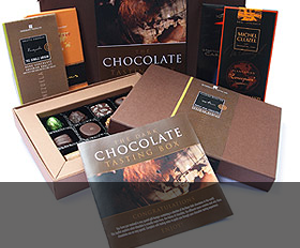
Fine chocolate offers and vouchers....latest offer
Blogging tutorials
Easy tips to make your blog, twitter or tumblr accounts look good....see example

Social networking tips
Published articles by me on networking and social tools....see example

Art & Photography
Licenced images by Mandy Collins....read more
Showing posts with label home scanning tips. Show all posts
Showing posts with label home scanning tips. Show all posts
Wednesday, February 25, 2009


Sunday, January 13, 2008
Home Scanning Tips - 5
If you've been following our little collection of home photograph scanning tips, then thank you for your interest. We hope you've found them useful.
Our last tip (for now) features cropping - when to crop, when not to crop, particularly if you're intending to use your scan for a photo gift order. However, many of the tips and guidelines still apply.
Tip 5 - Crop your scan to the image itself.
We do receive some images where the whole scanner bed is the image. At Fabulous Photo Gifts, we hand check every order photograph and crop etc where required, however some more automated companies might 'print what they get' and you would end up with a mousemat etc with a postage stamp size actual image surrounded by lots of white!
Try to scan your image squarely.
No we don't mean we only accept square scans! What we mean is try to line your print up with the horizontal and vertical guides on the scanner bed. This will reduce your file size and help us to process your order that little bit quicker.
Don't crop the scan.
Don't be tempted to crop your scanned image as we never 'stretch to fit'. If there is a particular area of a scanned photo you want omitting or want the gift centered on, then just email us after placing your order (or make notes in the checkout comments section) and we'll do our very best to help.
Better to have too much image to work with than not enough.
Well that just about covers it for now. We'll probably add to the series later but if there's a particular topic or question you'd like answering, then just leave a comment to this post and Fabulous Photo Gifts will try to answer it.
To jump to Home Scanning Tip 3 & 4 - Click here
Our last tip (for now) features cropping - when to crop, when not to crop, particularly if you're intending to use your scan for a photo gift order. However, many of the tips and guidelines still apply.
Tip 5 - Crop your scan to the image itself.
We do receive some images where the whole scanner bed is the image. At Fabulous Photo Gifts, we hand check every order photograph and crop etc where required, however some more automated companies might 'print what they get' and you would end up with a mousemat etc with a postage stamp size actual image surrounded by lots of white!
Try to scan your image squarely.
No we don't mean we only accept square scans! What we mean is try to line your print up with the horizontal and vertical guides on the scanner bed. This will reduce your file size and help us to process your order that little bit quicker.
Don't crop the scan.
Don't be tempted to crop your scanned image as we never 'stretch to fit'. If there is a particular area of a scanned photo you want omitting or want the gift centered on, then just email us after placing your order (or make notes in the checkout comments section) and we'll do our very best to help.
Better to have too much image to work with than not enough.
Well that just about covers it for now. We'll probably add to the series later but if there's a particular topic or question you'd like answering, then just leave a comment to this post and Fabulous Photo Gifts will try to answer it.
To jump to Home Scanning Tip 3 & 4 - Click here
Thursday, January 10, 2008
Home Scanning Tips - Tip 3 and 4
Home Scanning Tips - Numbers 3 and 4
As number 3 is just a short one, I've posted tip 4 as well. Common sense? Well yes probably but you'd be amazed how many people never do carry out the two tips below that deal with image quality.
Tip 3. View your scan at print size.
This will help show up any flaws in the scan or quality of the original photograph.
Tip 4. Clean the scanner plate and the print you're intending to scan before you start. Sounds obvious but you'd be amazed at the number of scanned images we receive where the dust is visible in the pre-production and sometimes the finished photo gift.
There will be more tips later this week.
To jump to Home Scanning Tip 2 - Click here
As number 3 is just a short one, I've posted tip 4 as well. Common sense? Well yes probably but you'd be amazed how many people never do carry out the two tips below that deal with image quality.
Tip 3. View your scan at print size.
This will help show up any flaws in the scan or quality of the original photograph.
Tip 4. Clean the scanner plate and the print you're intending to scan before you start. Sounds obvious but you'd be amazed at the number of scanned images we receive where the dust is visible in the pre-production and sometimes the finished photo gift.
There will be more tips later this week.
To jump to Home Scanning Tip 2 - Click here
Monday, January 07, 2008
Home Scanning Tips - Tip 2
Home Scanning tips number 2 - De-screening and other filters.
De-screening and other filters.
If your scanner and software has de-screening, noise reduction or restoration/colour restore options, then make several scans with the various settings and compare which one gives the best results. Sometimes, the best scan is the original without any restoration or de-screening!
To jump to home scanning tip 1, click here.
De-screening and other filters.
If your scanner and software has de-screening, noise reduction or restoration/colour restore options, then make several scans with the various settings and compare which one gives the best results. Sometimes, the best scan is the original without any restoration or de-screening!
To jump to home scanning tip 1, click here.
Saturday, January 05, 2008
Home Photograph Scanning Tips - Number 1
Scanners for transferring photographs and other printed materials into your computer are becomimg better and better with each new generation or model launch and home scanning is still big business although expected to decline as more and more of us get into digital photography.
Old photo's make great subject matter for personalising photo gifts with and we see quite a few order uploads involving home scanned photographs, sometimes with not the best results.
It's worth reminding you that Fabulous Photo Gifts does offer a free professional scanning service (maximum size A4) as part of any order made via the post. However, as most home scanners are perfectly capable of producing a decent quality scan, here are a few tips.
Scan at 300dpi.
If you have the option, then always scan at 300 dpi. Don't worry about file size at this point as you can always reduce the dpi gradually if your final scan is over the 10Mb upload limit.
72dpi scans usually result in smaller file sizes which don't resize to well as so much original information is lost in the scan.
We'll be publishing more home scanning tips throughout the next couple of weeks so remember to re-visit. Alternatively, why not subscribe to our RSS Feed which will alert you when a new tip is published?
Old photo's make great subject matter for personalising photo gifts with and we see quite a few order uploads involving home scanned photographs, sometimes with not the best results.
It's worth reminding you that Fabulous Photo Gifts does offer a free professional scanning service (maximum size A4) as part of any order made via the post. However, as most home scanners are perfectly capable of producing a decent quality scan, here are a few tips.
Scan at 300dpi.
If you have the option, then always scan at 300 dpi. Don't worry about file size at this point as you can always reduce the dpi gradually if your final scan is over the 10Mb upload limit.
72dpi scans usually result in smaller file sizes which don't resize to well as so much original information is lost in the scan.
We'll be publishing more home scanning tips throughout the next couple of weeks so remember to re-visit. Alternatively, why not subscribe to our RSS Feed which will alert you when a new tip is published?
Subscribe to:
Posts (Atom)