Having recently invested in a replacement laptop - my main PC for web design and updates etc, I upgraded my Dreamweaver to edition CS3 for my new MacBook Pro.
I noticed and had been struggling to work with the rather small font size in the CODE view on Dreamweaver and had almost resigned myself to squinting through the long dark web designing hours after failing to find a setting to change the font size.
However, I've managed to track down the setting and its location - it all made sense of course - but then things do when you know how.
To amend the font size in the CODE view only - go to Dreamweaver - Preferences - Fonts - Code View and amend the code view font size.
Mine was defaulting to size 7 (size 9 is bigger even though it says beside it 'smallest' and is the size i've now defaulted the code view on my Dreamweaver CS3 to).
Hope that helps anyone else struggling out there. If I come across any more Dreamweaver CS3 tips, i'll pass them on.
Jonathan - technical partner - Fabulous Photo Gifts
A little flavour of what's in store...
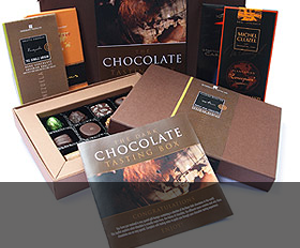
Gifts & Giveaways
Fine chocolate offers and vouchers....latest offer

Blogging tutorials
Easy tips to make your blog, twitter or tumblr accounts look good....see example

Social networking tips
Published articles by me on networking and social tools....see example

Art & Photography
Licenced images by Mandy Collins....read more
Showing posts with label how to guide. Show all posts
Showing posts with label how to guide. Show all posts
Thursday, May 29, 2008


Wednesday, September 05, 2007
new visual guide to photo gift shop pages
New feature on Fabulous Photo Gifts – the visual page guide.
We just wanted to tell you about a new feature on the Fabulous Photo Gifts website.
It's a visual 'map' of a typical photo gift item shop page. Visitors to our site will notice that every individual shop page has the same layout – a picture of the gift idea, some text explaining the photo gift and then a series of purchase options below where you can actually add an item to your basket.
There is other information like delivery times, postal order forms and links to other help and information pages too.
Our new visual display highlights all the features and explains their purpose so you'll be able to get more out of your online photo gift shopping experience.
The addition of this new feature came about as we appreciate that for many, a visit to Fabulous Photo Gifts may be the first time many have actually purchased something online, certainly for many, the first time they've personalised a photo gift online so we wanted to make the experience as easy as possible.
You can view the new visual shopping page guide by clicking here.
You'll also find links to the new visual guide on the 'how to order' and 'faq's page'.
You'll find helpful little note boxes pointing to key areas of information. However, why not explore on your own or if you have any questions, then don't hesitate to get in touch by email or phone and we'll be more than happy to help you further.
We just wanted to tell you about a new feature on the Fabulous Photo Gifts website.
It's a visual 'map' of a typical photo gift item shop page. Visitors to our site will notice that every individual shop page has the same layout – a picture of the gift idea, some text explaining the photo gift and then a series of purchase options below where you can actually add an item to your basket.
There is other information like delivery times, postal order forms and links to other help and information pages too.
Our new visual display highlights all the features and explains their purpose so you'll be able to get more out of your online photo gift shopping experience.
The addition of this new feature came about as we appreciate that for many, a visit to Fabulous Photo Gifts may be the first time many have actually purchased something online, certainly for many, the first time they've personalised a photo gift online so we wanted to make the experience as easy as possible.
You can view the new visual shopping page guide by clicking here.
You'll also find links to the new visual guide on the 'how to order' and 'faq's page'.
You'll find helpful little note boxes pointing to key areas of information. However, why not explore on your own or if you have any questions, then don't hesitate to get in touch by email or phone and we'll be more than happy to help you further.
Wednesday, June 06, 2007
Using Socializer on Blogger - how to guide
Hi.
After struggling to get the code exactly right to create a social bookmarking link using Socializer on my Google Blog, I thought others might appreciate a copy of how I did it and the code I used.
Despite coming across a number of helpful Blog entries, I still struggled. Hopefully, my own aid below will help you out.
1) In your blog under the TEMPLATE tab
click on ADD PAGE ELEMENT
Give the page element a title, e.g Social Bookmarking links
2) In the main body window of the element, paste the following code:
You'll see that url=http (etc) features the slashes so you don't need to retype the http:// bit of your URL when entering it. E.G this blog url is http://purple13.blogspot.com, but the cut and paste code already deals with the http:// so you just need to add the rest.
Don't forget to add your own URL here in place of the Purple13 one!!
The image link is wherever you've uploaded your own socializer logo too. For this you will need to have a server where you can upload image (Flickr, etc.) and also need to know the URL of that image. You can grab a copy of the icons (small or large) from http://ekstreme.com/socializer/.
Hope that helps. Now i've fulfilled a self made promise to help others by publishing this as soon as i'd found out how to do it myself.
Socializer allows you to socially bookmark a website or blog to your preferred bookmarking site rather than the website or blog having to create bookmark links to all the bookmarking sites seperately.
After struggling to get the code exactly right to create a social bookmarking link using Socializer on my Google Blog, I thought others might appreciate a copy of how I did it and the code I used.
Despite coming across a number of helpful Blog entries, I still struggled. Hopefully, my own aid below will help you out.
1) In your blog under the TEMPLATE tab
click on ADD PAGE ELEMENT
Give the page element a title, e.g Social Bookmarking links
2) In the main body window of the element, paste the following code:
<a href="http://ekstreme.com/socializer/?url=http%3A%2F%2Fpurple13.blogspot.com%2F&title=Fabulous Photo Gifts - News, Features etc"><img src="http://www.myurlhere.com/Socializer16.png"> Social bookmark this Blog</a>
You'll see that url=http (etc) features the slashes so you don't need to retype the http:// bit of your URL when entering it. E.G this blog url is http://purple13.blogspot.com, but the cut and paste code already deals with the http:// so you just need to add the rest.
Don't forget to add your own URL here in place of the Purple13 one!!
The image link is wherever you've uploaded your own socializer logo too. For this you will need to have a server where you can upload image (Flickr, etc.) and also need to know the URL of that image. You can grab a copy of the icons (small or large) from http://ekstreme.com/socializer/.
Hope that helps. Now i've fulfilled a self made promise to help others by publishing this as soon as i'd found out how to do it myself.
Socializer allows you to socially bookmark a website or blog to your preferred bookmarking site rather than the website or blog having to create bookmark links to all the bookmarking sites seperately.
Subscribe to:
Posts (Atom)